0 Comments
The purpose of this assignment is to review and prepare for the Final CTE test! We will each have a study guide and this information will help us fill it out. You'll be divided into groups and each group will be assigned a CTE digital photo Standard. Your job is to be the EXPERT on this standard because you'll be teaching the class!
CREATE A SLIDESHOW
To access the information you need to cover, find your standard here: http://timpanogosphotography.weebly.com/digital-photo-study-guide.html
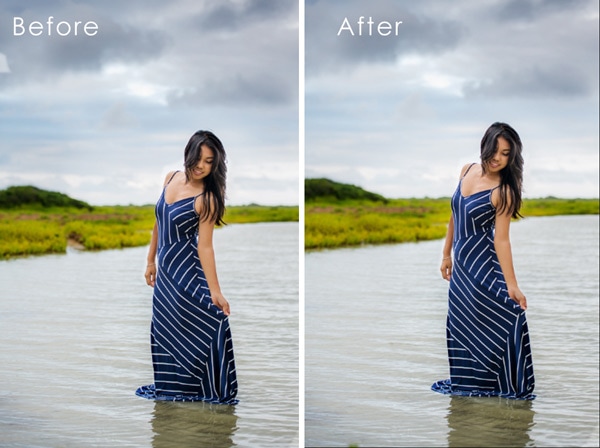
The two images below AND above are of new photoshop files and look almost identical. However, there are 2 HUGE differences! One is for PRINT while the other is for SCREEN. 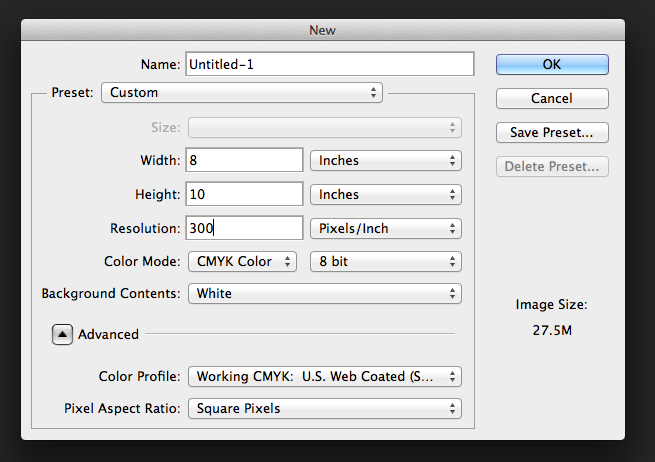 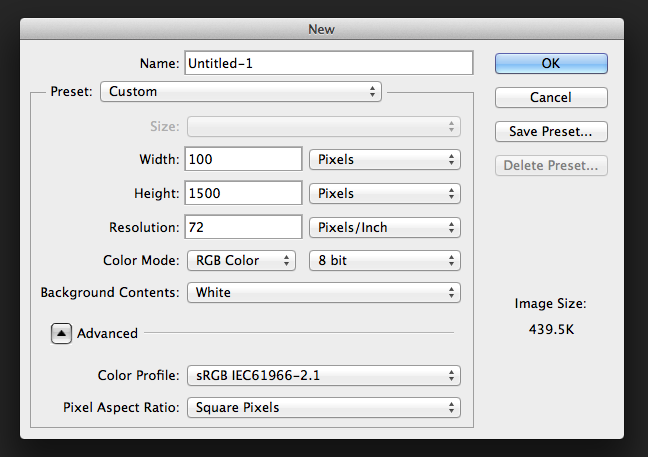 Hey guys. Sorry I'm not here today. Feeling under the weather and need to regain my strength so I can beat you at Spirit Bowl tomorrow ;)
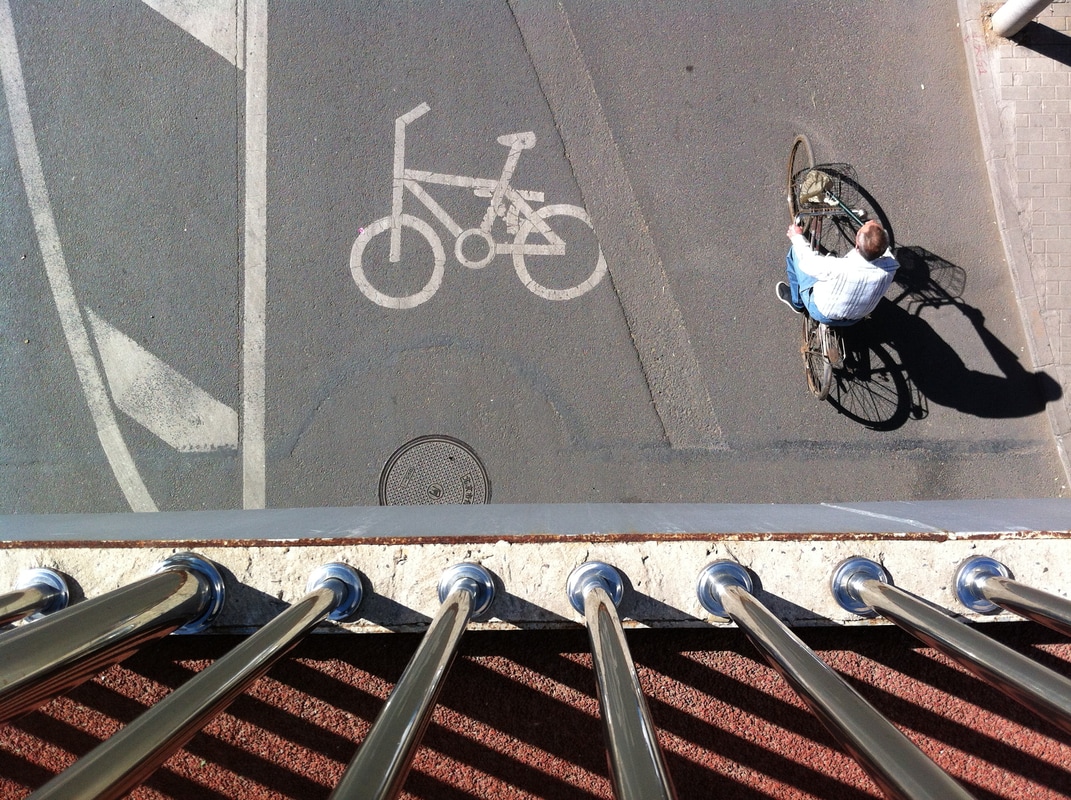
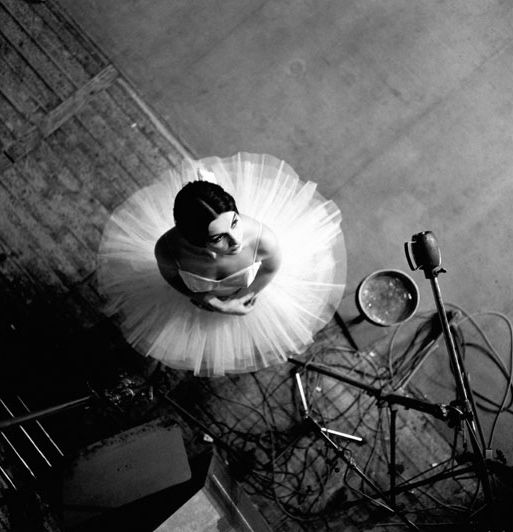
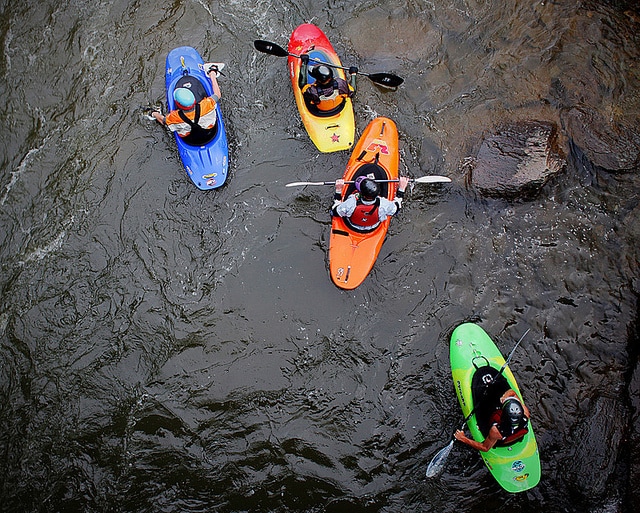
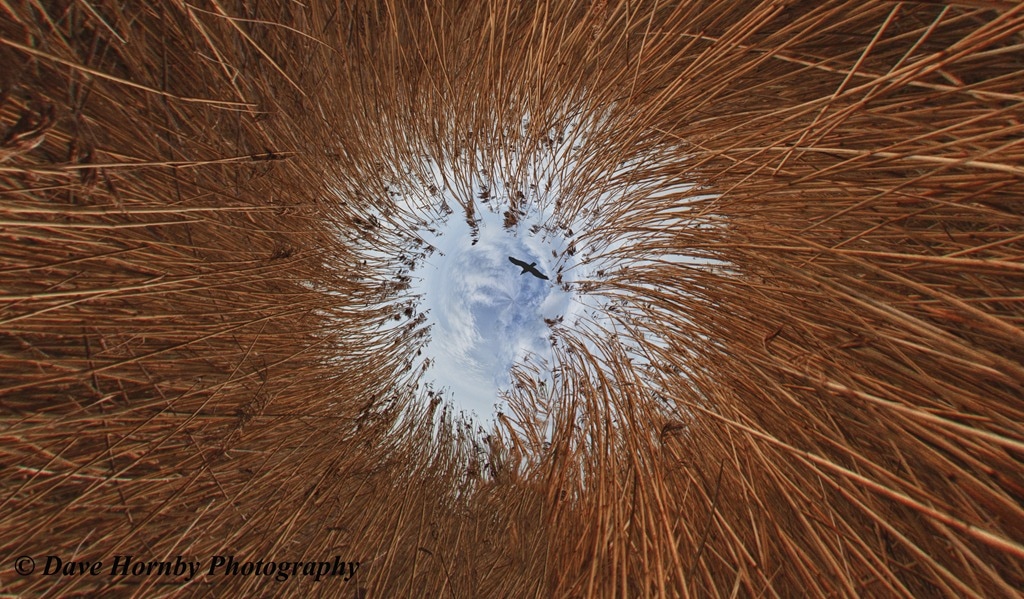
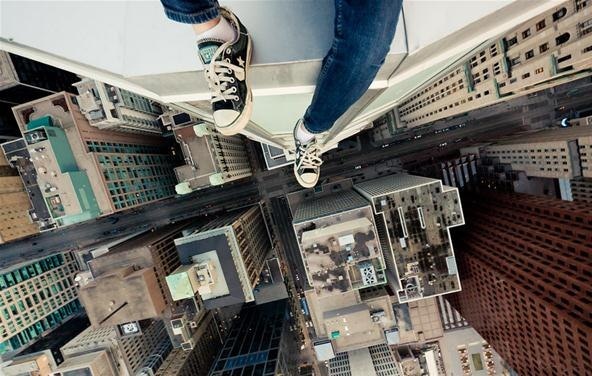
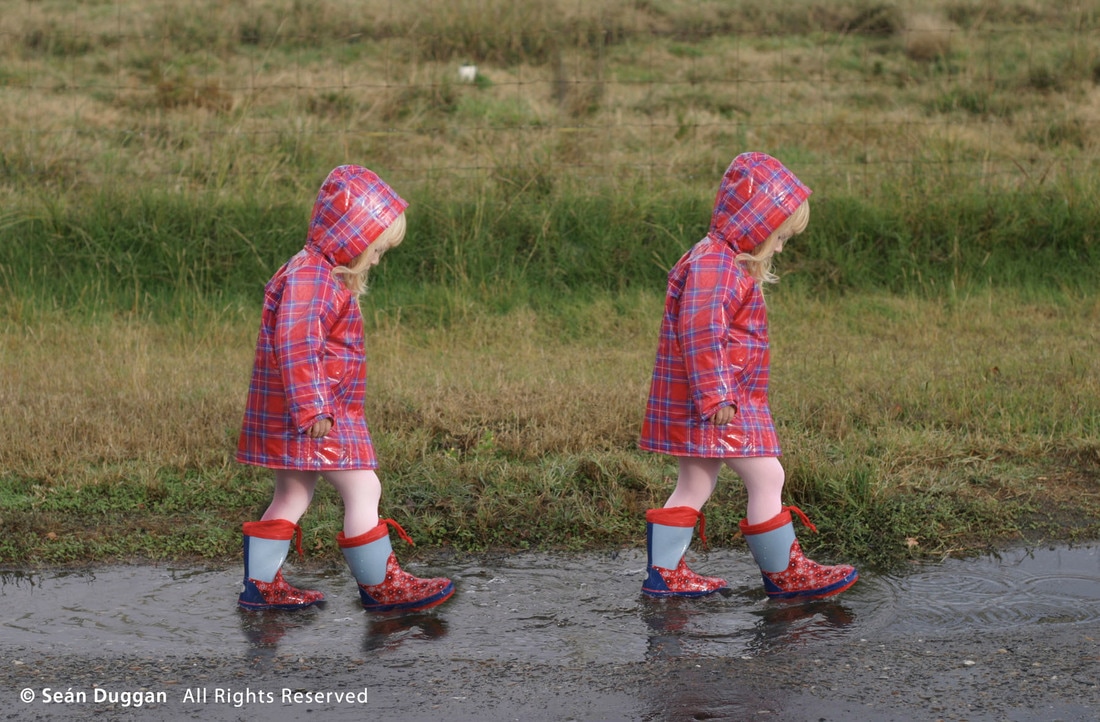
Please be on your best for Ms. Udall. Remember, WWMRD? Today's Assignment: Check the POTD (he's a photoshop wizard!) Finish editing images from the "point of view" shoot -1 birds eye -1 worms eye - viewers eye -free choice Create a contact sheet and turn into the drive. Will someone make a new folder for it?! "Point of View Contact Sheet" CREATE A PORTFOLIO When finished, create a new folder in the drive called "PORTFOLIO". Each Student will each add their own folder of a selection of their best EDITED work. 7 total. Photos can be from class assignments OR outside of class work. This will come in handy as we select work for upcoming shows! I imagine building your portfolio of work will take the rest of class time but if you finish, do some of your own POTD research. Find a photographer who's work you admire! Birds EyeShooting from above a subject allows the viewer to feel superior to the subject or feel protective of the subject. It can also give the viewer the impression that they are the object of the attention of the subject in the photo, as though it was the viewer placed on a stage (like in the example photo below). If the stage or "place on a pedestal" effect is achieved, the viewer will often feel adversarial towards the subject. Worms EyeWhen you shoot a photo from below a subject can make the viewer feel as though the subject is in control of a situation. The simple act of looking up at a subject/object can impart a loss of control or the idea that the object is unobtainable. This has been used in real world situations throughout history. For example, thrones are set higher than other chairs, judges sit on a podium, and executive desks are just a bit taller than normal desks. The low shooting angle can also give the illusion of being inside the frame if the angle is severe enough. Like almost everything in photography, this goes back to our instinctual reactions to situations. In a forest of tall trees we feel small looking up. As a child we must obey our larger parents. Shooting with an upwards angle allows us to tap into this instinctive response. Viewers EyeSHORTCUT! Click S for the clone stamp tool
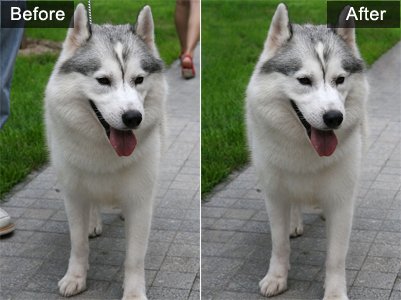
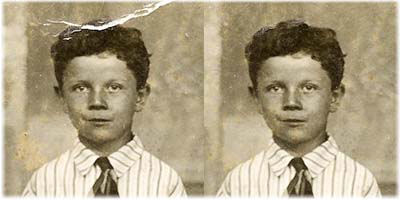
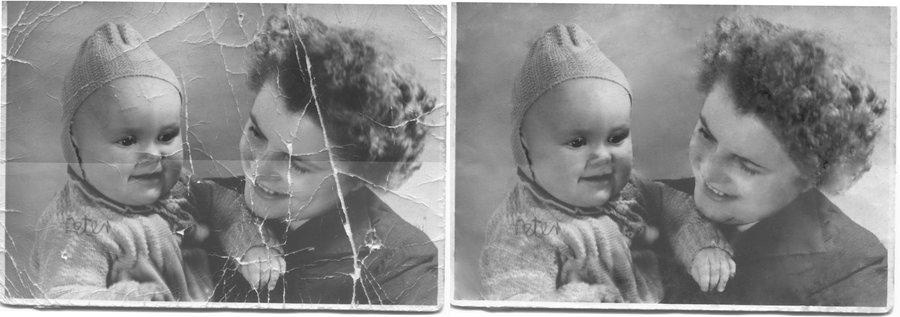
AssignmentUsing the clone stamp, "Fix" 3 images. At least ONE image has to be from the moderately difficult category. If you'd like to use one of your own photos for one of the three, you can. Easy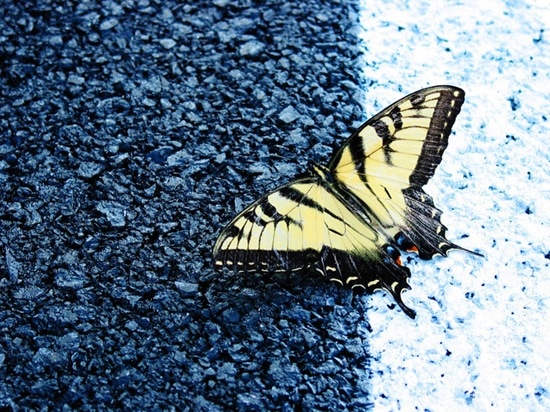      Medium     Often times you'll find yourself in photoshop hitting a wall because you can't figure out how to make your cool ideas come to life. It's important we know photoshop tools, their location, and how to utilize them. Using the worksheet handed out, photoshop itself (it's a better cheat than your neighbor!), and this list below, label each photoshop tool. This information will be on the end of semester CTE exam! But more importantly, it will help you be a better editor.
Rectangular Marquee Tool Use this tool to make selections on your image, in a rectangular shape. This changes the area of your image that is affected by other tools or actions to be within the defined shape. Holding the [Shift] key while dragging your selection, restricts the shape to a perfect square. Holding the [Alt] key while dragging sets the center of the rectangle to where your cursor started. Eraser Tool This is the anti-Brush tool. It works like an eraser (duh) and erases whatever information wherever you click and drag it. If you’re on a Layer, it will erase the information transparent. If you are on the background layer, it erases with whatever secondary color you have selected. Gradient Tool You can use this to make a gradiation of colors. Gradiation doesn’t appear to be a word, but it makes sense anyway. It creates a blending of your foreground color and background color when you click and drag it. Like a gradient. Slice Tool This is used mostly for building websites, or splitting up one image into smaller ones when saving out. It’s kind of an advanced tool, and since you’re in here for the basics, we’ll kind of skip over it. Kinda makes you mad I made you read all that for nothing, huh? Move Tool Use this tool to, well, move things. Usually you use it to move a Layer around after it has been placed. Hold the [Shift] key to limit the movements to vertical/horizontal. Polygon Lasso Tool Ok, this should be the Lasso Tool, but I use the Polygon Lasso a lot more often. Use this to draw selections in whatever shape you would like. To close the selection, either click on the beginning point (you’ll see the cursor change when you’re on it), or just double-click. When holding the [Ctrl] key, you’ll see the cursor change, and the next time you click, it will close your selection. Healing Brush Tool This is a really useful tool. Mildly advanced. You can use this tool to repair scratches and specs and stuff like that on images. It works like the Brush tool (see below). You choose your cursor size, then holding the [Alt] key, you select a nice/clean area of your image. Let go of the [Alt] key and paint over the bad area. It basically copies the info from the first area to the second, in the form of the Brush tool. Only, at the end, it averages the information, so it blends. Brush Tool This is one of the first tools ever. It’s what Photoshop is based off of. Well, not really, but it’s pretty basic. It paints one your image, in whatever color you have selected, and whatever size you have selected. There’s a lot of options for it, but this is basic, so you don’t get to learn them. Ha. Clone Stamp Tool This is very similar to the Healing Brush Tool (see above). You use it the exact same way, except this tool doesn’t blend at the end. It’s a direct copy of the information from the first selected area to the second. When you learn to use both of these tools together in perfect harmony, you will be a Photoshop MASTA! Not really, it’s just less irritating. Magic Wand Tool Use this to select a color range. It will select the block of color, or transparency, based on wherever you click. In the Options Bar at the top, you can change the Tolerance to make your selections more/less precise. Crop Tool The Crop Tool works similarly to the Rectangular Marquee tool (see above if you have no short-term memory). The difference is when you press the [Enter/Return] key, it crops your image to the size of the box. Any information that was on the outside of the box is now gone. Not permanently, you can still undo. History Brush Tool This tool works just like the Brush Tool (see above) except the information that it paints with is from the original state of your image. If you go Window>History, you can see the History Palette. The History Brush tool paints with the information from whatever History state is selected. Path Selection Tool You use this tool when working with paths. Since this is all about the basics, I won’t go into details. It’s related to the Pen Tool (see below) though. Horizontal Type Tool It makes type. Or text. Or whatever you want to call it. You can click a single point, and start typing right away. Or you can click and drag to make a bounding box of where your text/type goes. There’s a lot of options for the Type Tool. Just play around, it’s fairly straight-forward. Blur Tool The Blur tool is cool. It makes things blurry. Click and drag to make things blurry. The more you click and drag, the blurrier things get. Dodge Tool This tool isn’t as crappy as the car brand. It’s actually used to lighten whatever area you use it on. As long as it is not absolute black. Absolute black won’t lighten. Pen Tool I mentioned this tool above. It’s for creating paths, in which you would use the Path Selection Tool to select the path. Paths can be used in a few different ways, mostly to create clipping paths, or to create selections. You use the tool by clicking to add a point. If you click and drag, it will change the shape of your path, allowing you to bend and shape the path for accurate selections and such. Hand Tool You can really make short work of your job with the Hand Tool. It’s for moving your entire image within a window. So if you’re zoomed in and your image area is larger than the window, you can use the Hand Tool to navigate around your image. Just click and drag. You can get to this tool at any time when using any other tool by pressing and holding the [Spacebar]. Zoom Tool Pretty obvious what this tool does. It allows you to zoom into your image. Don’t be dumb, it doesn’t actually change the size of your image. Hold the [Alt] key to zoom out. Holding the [Shift] key will zoom all of the windows you have open at the same time. Double-click on the Zoom Tool in the palette to go back to 100% view. Rectangle Tool By default it draws a Shape Layer in the form of a rectangle. It fills the rectangle with whatever foreground color you have selected. It’s pretty complicated, don’t hurt yourself with this one. Notes Tool Like post-it notes, but digital. You can use this tool to add small little note boxes to your image. These are useful if you’re very forgetful or if you’re sharing your Photoshop file with someone else. I’m pretty sure it only works with .PSD files. Eyedropper Tool This tool works by changing your foreground color to whatever color you click on. Holding the [Alt] key will change your background color. BONUS!! These are your color boxes. Foreground (in the front) and Background (in the back). Click on either one to bring up the color select dialog box. |
Class AssignmentsIf you miss class, review assignments to catch up. Archives
May 2017
Categories |


 RSS Feed
